When you add an RBL host with a license key in the hostname to your Synology MailPlus Server configuration. Such as the excellent Abusix Combined list. The key is reported to the attacker in the SMTP rejection message. You don’t want to share that private credential with anyone, let alone a rogue entity.
To apply this tweak to non-Synology systems change the steps and paths to your installation. It should work for all Postfix integrations.
How to
To remove the key from the rejection message you have to tell Postfix to rewrite the hostname of the RBL server.
sudo nano '/volume1/@appconf/MailPlus-Server/customize/postfix/main.cf'Add this line at the bottom:
postscreen_dnsbl_reply_map = hash:/volume1/@appconf/MailPlus-Server/customize/postfix/dnsbl_reply_mapSave the file by CTRL X, hit Y and [enter]
Do the same to the template file that is used for automatic generation of the config files:
sudo nano '/volume1/@appstore/MailPlus-Server/etc/template/main.template'Again at the bottom add this line:
postscreen_dnsbl_reply_map = hash:/volume1/@appconf/MailPlus-Server/customize/postfix/dnsbl_reply_mapSave it by pressing CTRL X, hit Y and [enter]
Rewriting the rejection message
Now we need to tell Postfix how to rewrite those hostname mentions in the errors.
sudo nano '/volume1/@appconf/MailPlus-Server/customize/postfix/dnsbl_reply_map'Copy-paste the following code.
Replace [key] with the license key you want to hide. Or use/add different RBL servers.
# Remove license key from RBL message
#
# http://www.postfix.org/postconf.5.html#postscreen_dnsbl_reply_map
#
# listname              new name
# secret.abusix.zone    abusix.zone

[key].combined.mail.abusix.zone  combined.mail.abusix.zone
[key].exploit.mail.abusix.zone   exploit.mail.abusix.zone
[key].black.mail.abusix.zone     black.mail.abusix.zone
Reload postfix
Tell Postfix to generate the hashfile with the instructions. You have to re-run this command each time you change the dnsbl_reply_map file.
sudo /var/packages/MailPlus-Server/target/sbin/postmap dnsbl_reply_mapAnd finally restart the MailPlus Server from the UI to get it working. This is the most reliable way to get it done, because the shell commands such as ‘synopkg’ and ‘start-stop-status’ don’t always touch all associated processes.
- In DSM go to Package Center
- If on desktop go to Installed packages
- Stop MailPlus (webmail) and then Synology MailPlus Server, wait for it to complete.
- Now start Synology MailPlus Server and then the MailPlus (webmail) package.
Checking the result
Wait for a spammer to contact your system. Shouldn’t take long on a public mailserver.
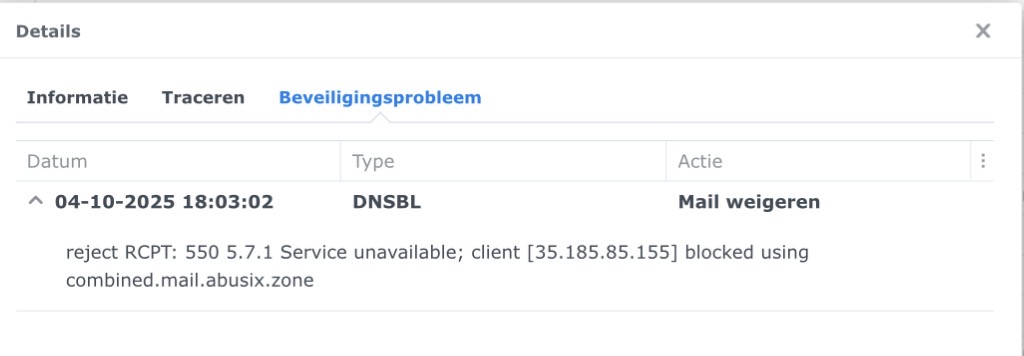
- Go to DSM > MailPlus Server > Auditing
- Open one of the blocked dnsbl entries
In the details you should find the reason for the rejection as they received it, with your license key removed.